
Use the example wiring from above and this interface for getting startet with noduino. Read values from an analog input device like a potentiometer and watch for pressed buttons, all basic functions are shown within this example. The needed .fzz file for making changes with the awesome
Fritzing Application is included as well. If you want to share your own wirings or found a bug please create a
Pull Request on GitHub!
$ > Not connected to noduino!
This interface is defined in views/example-walkLED.jade, all needed JavaScript is stored in
public/scrupts/app.walkLED.js using
RequireJS for loading dependencies. Please see RequireJS's manual for loading your scripts. Logging is done with the customized
Logger.HTML.js in
scripts/libs/.
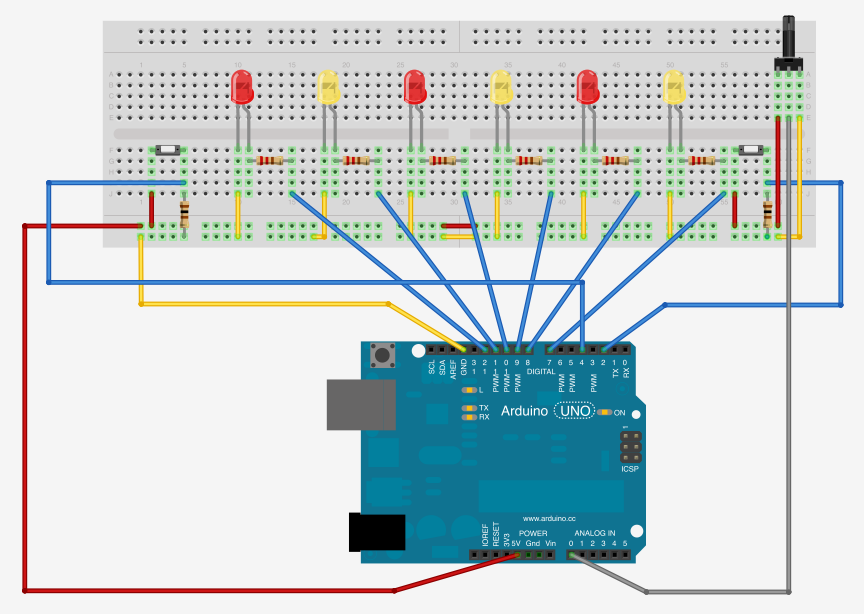
The wiring above can be used to test the included HTML web interface and the Node.js access as well. Connect your Arduino to you computer and start catching events happening on your Arduino with JavaScript. For sure you can easily fire events on your Arduino too!
$ > git clone git@github.com:sbstjn/noduino.git
$ > cd noduino/
$ > git submodule update --init
$ > npm install
$ > cd examples/
$ > node test.walkLED.js
After starting test.walkLED.js you are able to push the buttons in your wiring and see the LEDs blinking as you commanded. Use the analog input for changing walking speed. Binding events work as you might know from using Mootools, use AnalogInput.on(), LED.on() and Button.on() to bind custom functions to events like on, off, change, push or release. Not all functions are documented or even demonstrated with an example application, for getting used to noduino make sure to have a look at test.blinkLED.js and test.readAnalogIn.js.